

 Audience: Admin
Events are the starting point for managing your guests’ travel and expenses. Creating an event lets you define key parameters, including dates, locations, travel policy, and search settings, that drive travel and expense automation. You can also configure payment methods and budgets when applicable. Once set up, your event becomes the foundation for your guests’ entire travel and expense workflow.
Step by step
Budget and Payment Configuration
Event Information
Step 1: create your event.
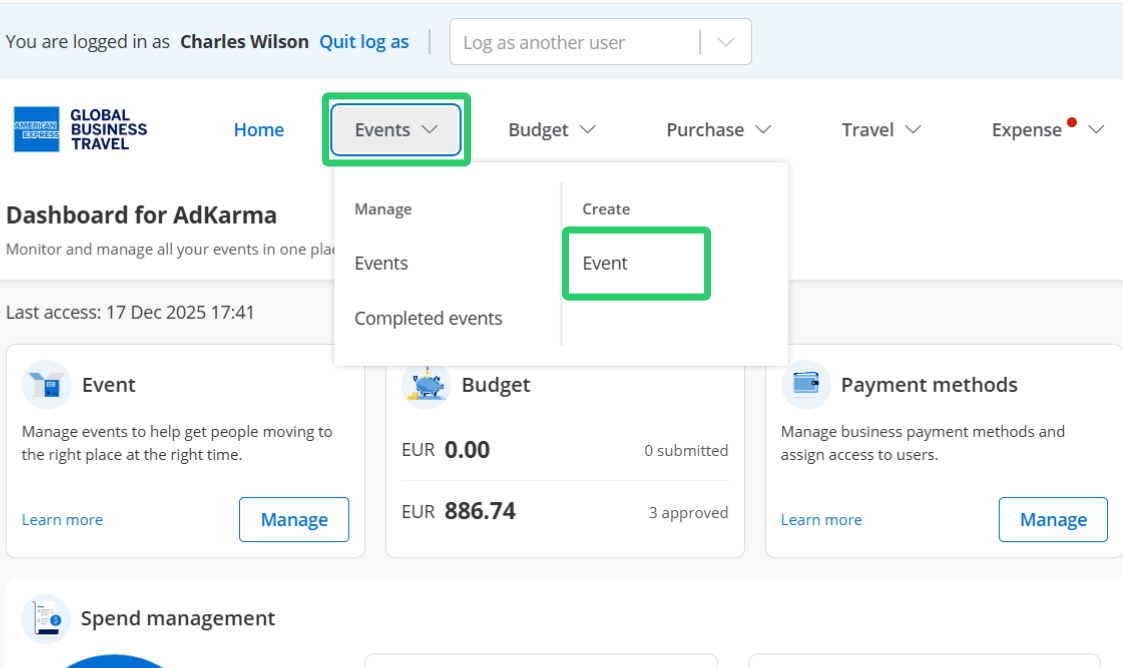
Select Events from the top navigation menu. Then select Event under the Create column.
Step 2: enter event details
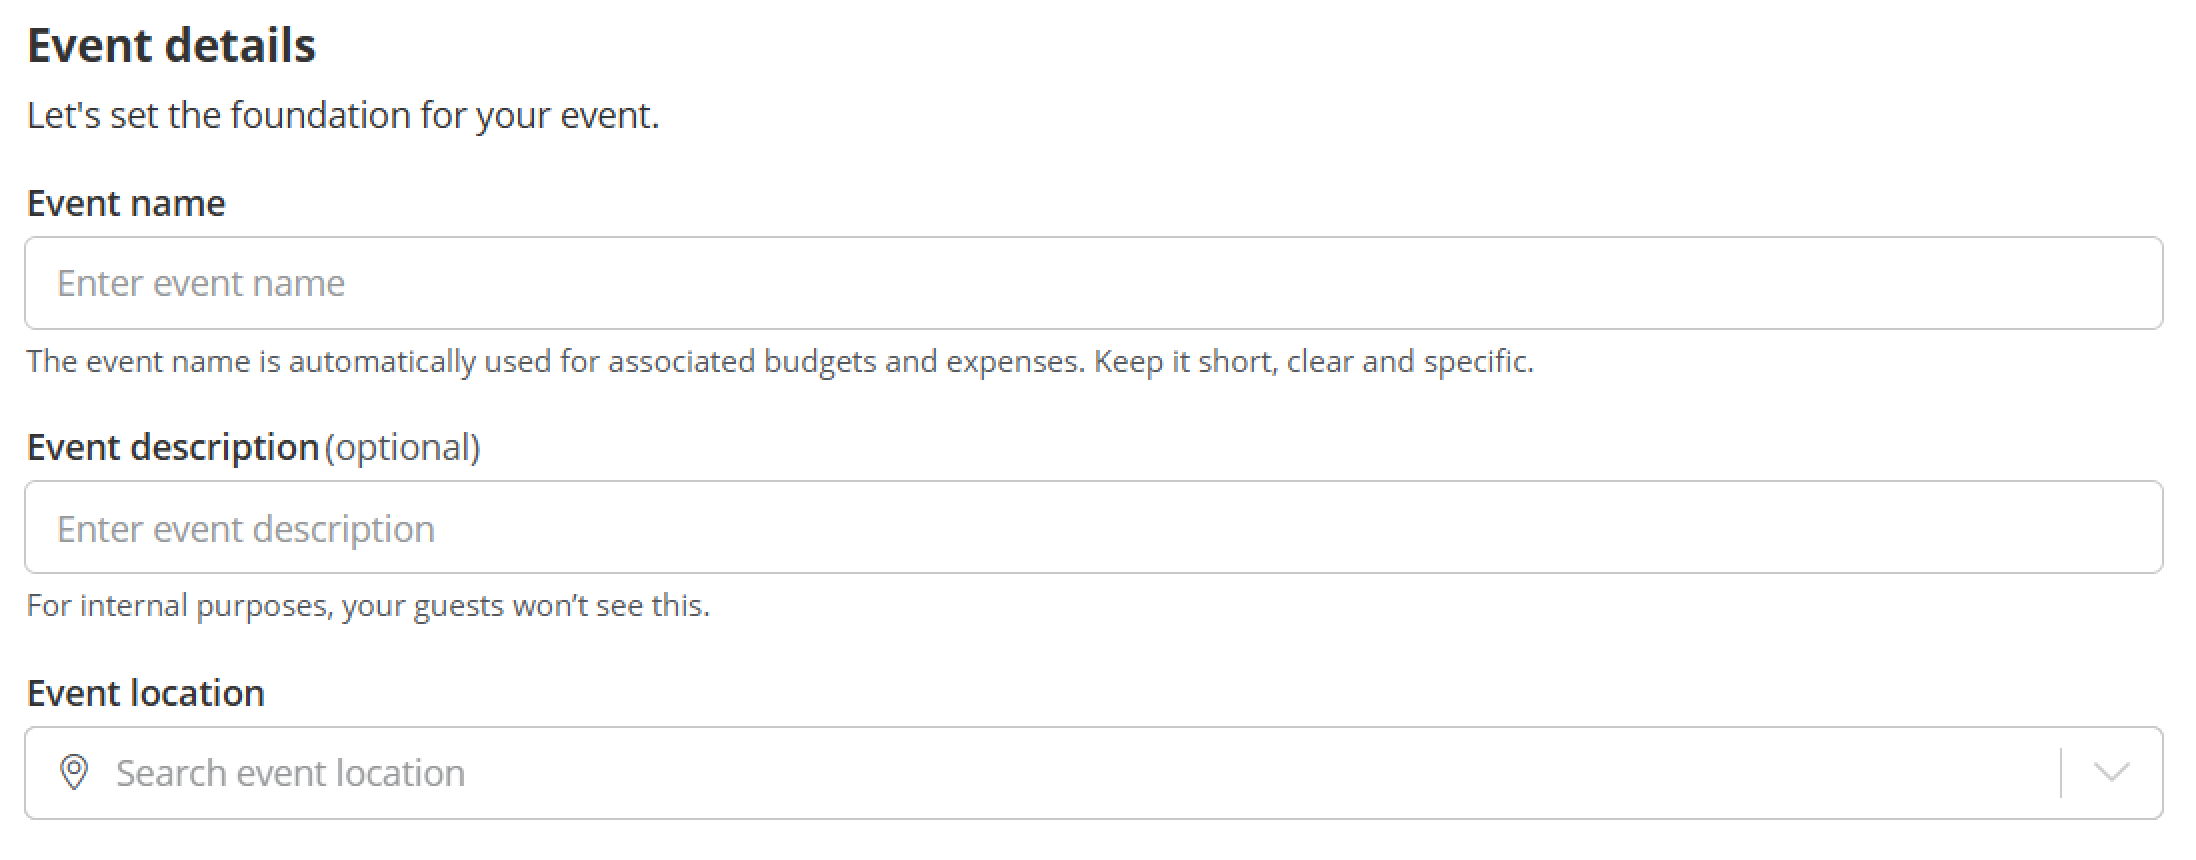
- Event name: create a name that's easy to identify as this will be used as a purpose for all related expenses.
- Event description (optional): add internal notes or details about the event for your team's reference. This helps you stay organized but remains hidden from guests.
- Event location: establish the destination for all travel arrangements.
 Tip: Use descriptive event names that will make sense in expense reports.
Key timeline management
Set up automated workflow triggers with five essential dates. The platform uses these dates to send targeted email and SMS reminders, ensuring guests complete their bookings on time and arrive/depart as planned.
Step 3: Event schedule.
Click on each field and pick dates from the calendar that opens. Also select times by clicking the clock—by default the current time will be applied.
Define key dates for your users to take action:
- The start and end dates of your event.
- End Time: When your event concludes and guests can depart.
- Registration deadline: when guest accounts should be ready for booking.

Tip: set realistic deadlines with enough time for booking completion.
Step 4: Event timeline.
Key dates are automatically set based on your event dates, but you can adjust them as needed:
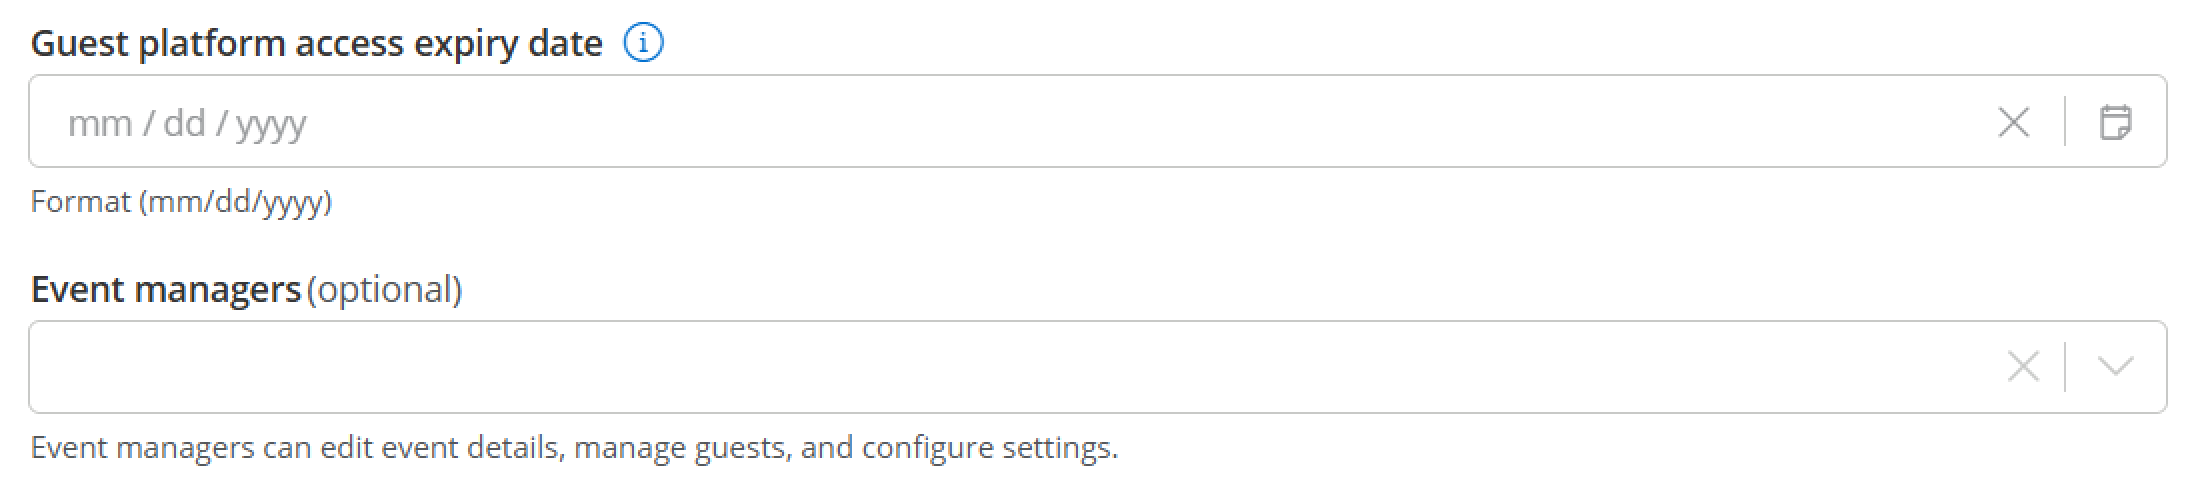
- Guest access expiry date: When guest access to the platform ends.
- Event managers (optional): A person who can edit event details, manage guests, and configure settings.
Tip: set your arrival time earlier than the time your training session, presentation or event's key activity actually starts at. Guests always need a bit more time to find location and seat or grab a coffee before the session. Step 5: Guest Notifications (Optional)
These key dates will trigger automated reminders so your guests can take action on time. Select which channels to enable for notifications.

RSVP
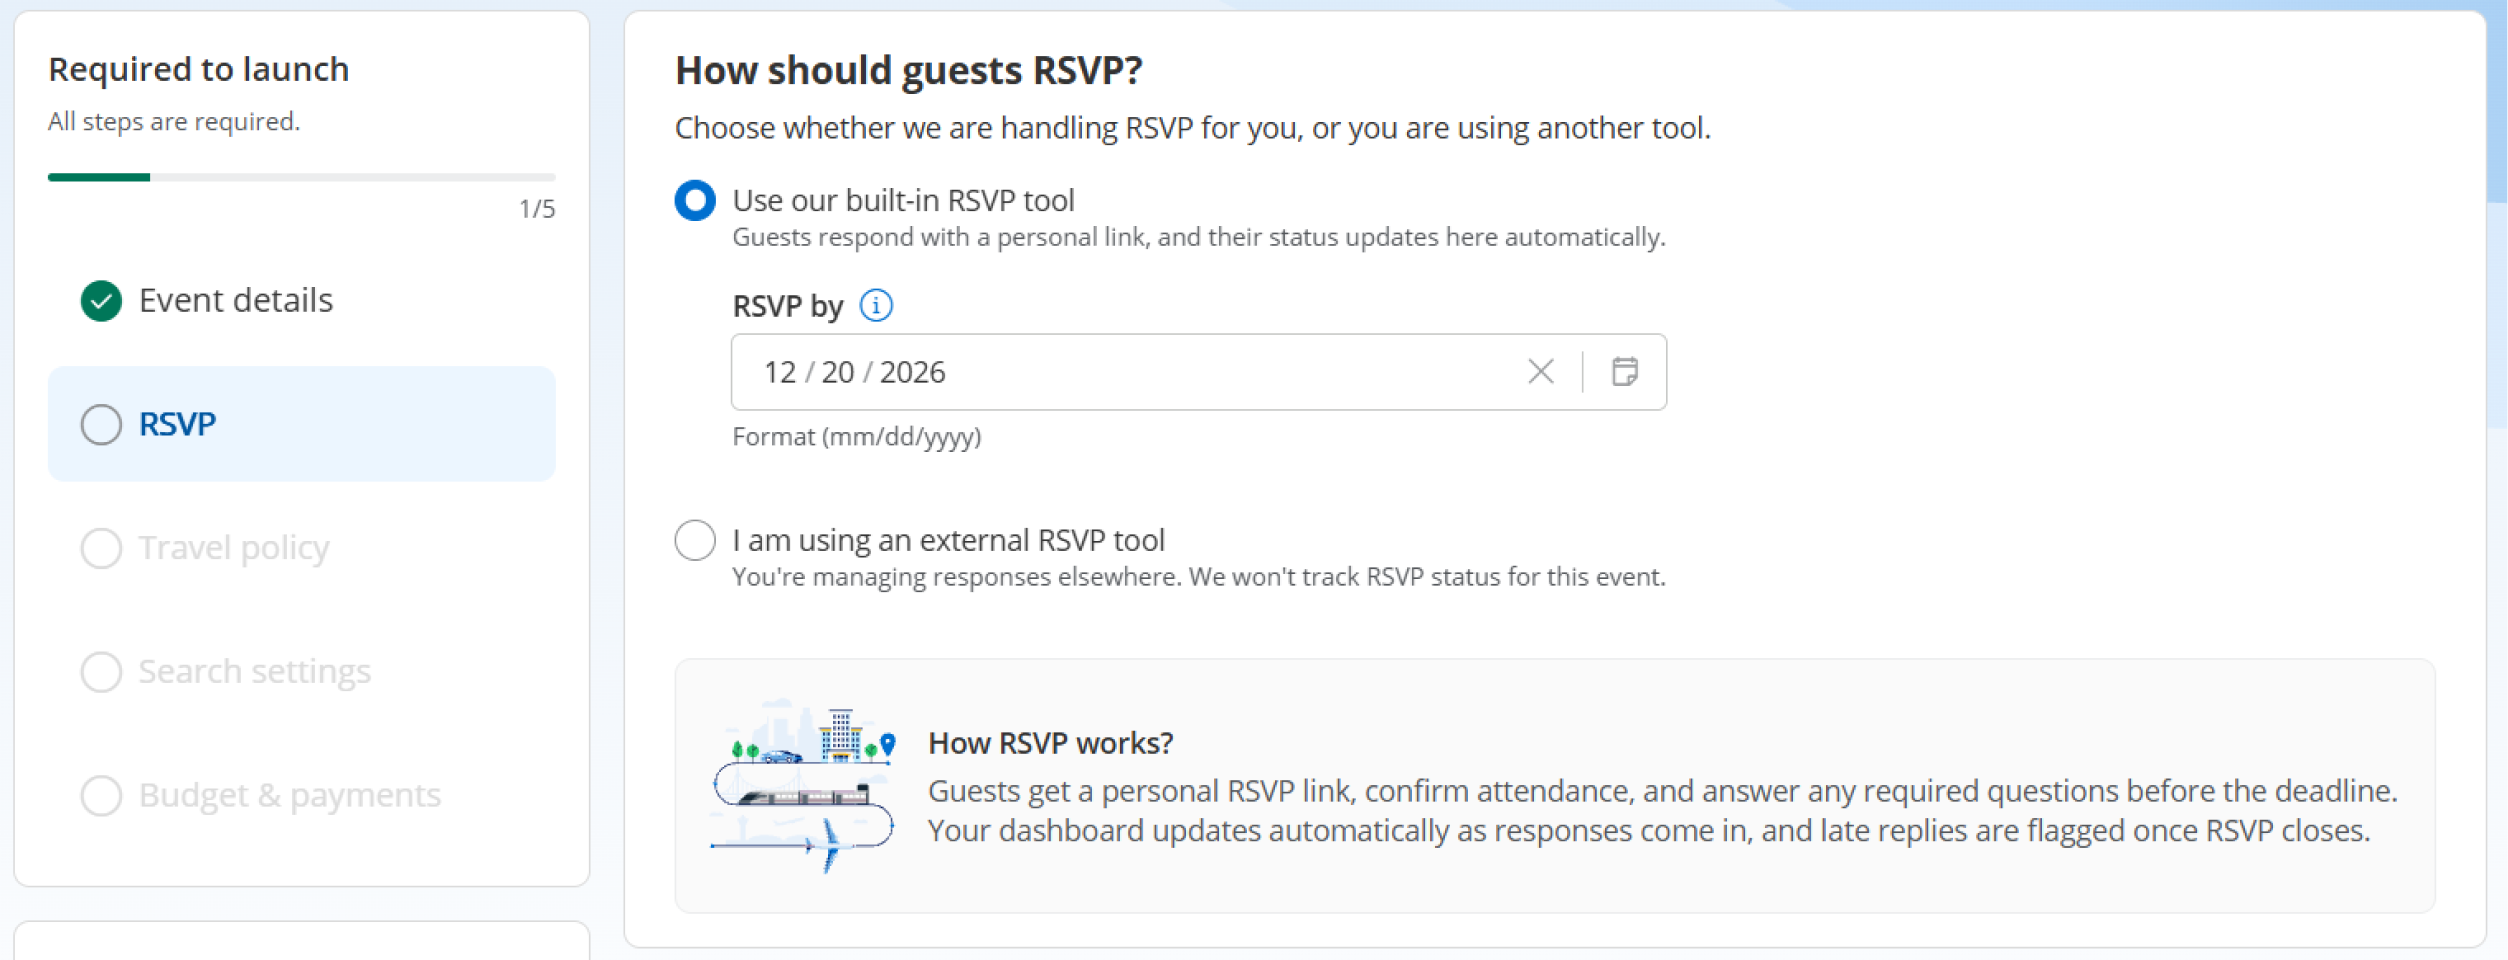
Step 6: Choose whether we are handling RSVP for your, or you are using another tool.
Travel Policy
Step 7: Enable travel categories and set up your policy
Choose whether guests need approval before booking.
Enable Air/Rail, Hotel, Ground Transportation or Car Rental categories for booking.
When disabled, guests won't be able to book that category.
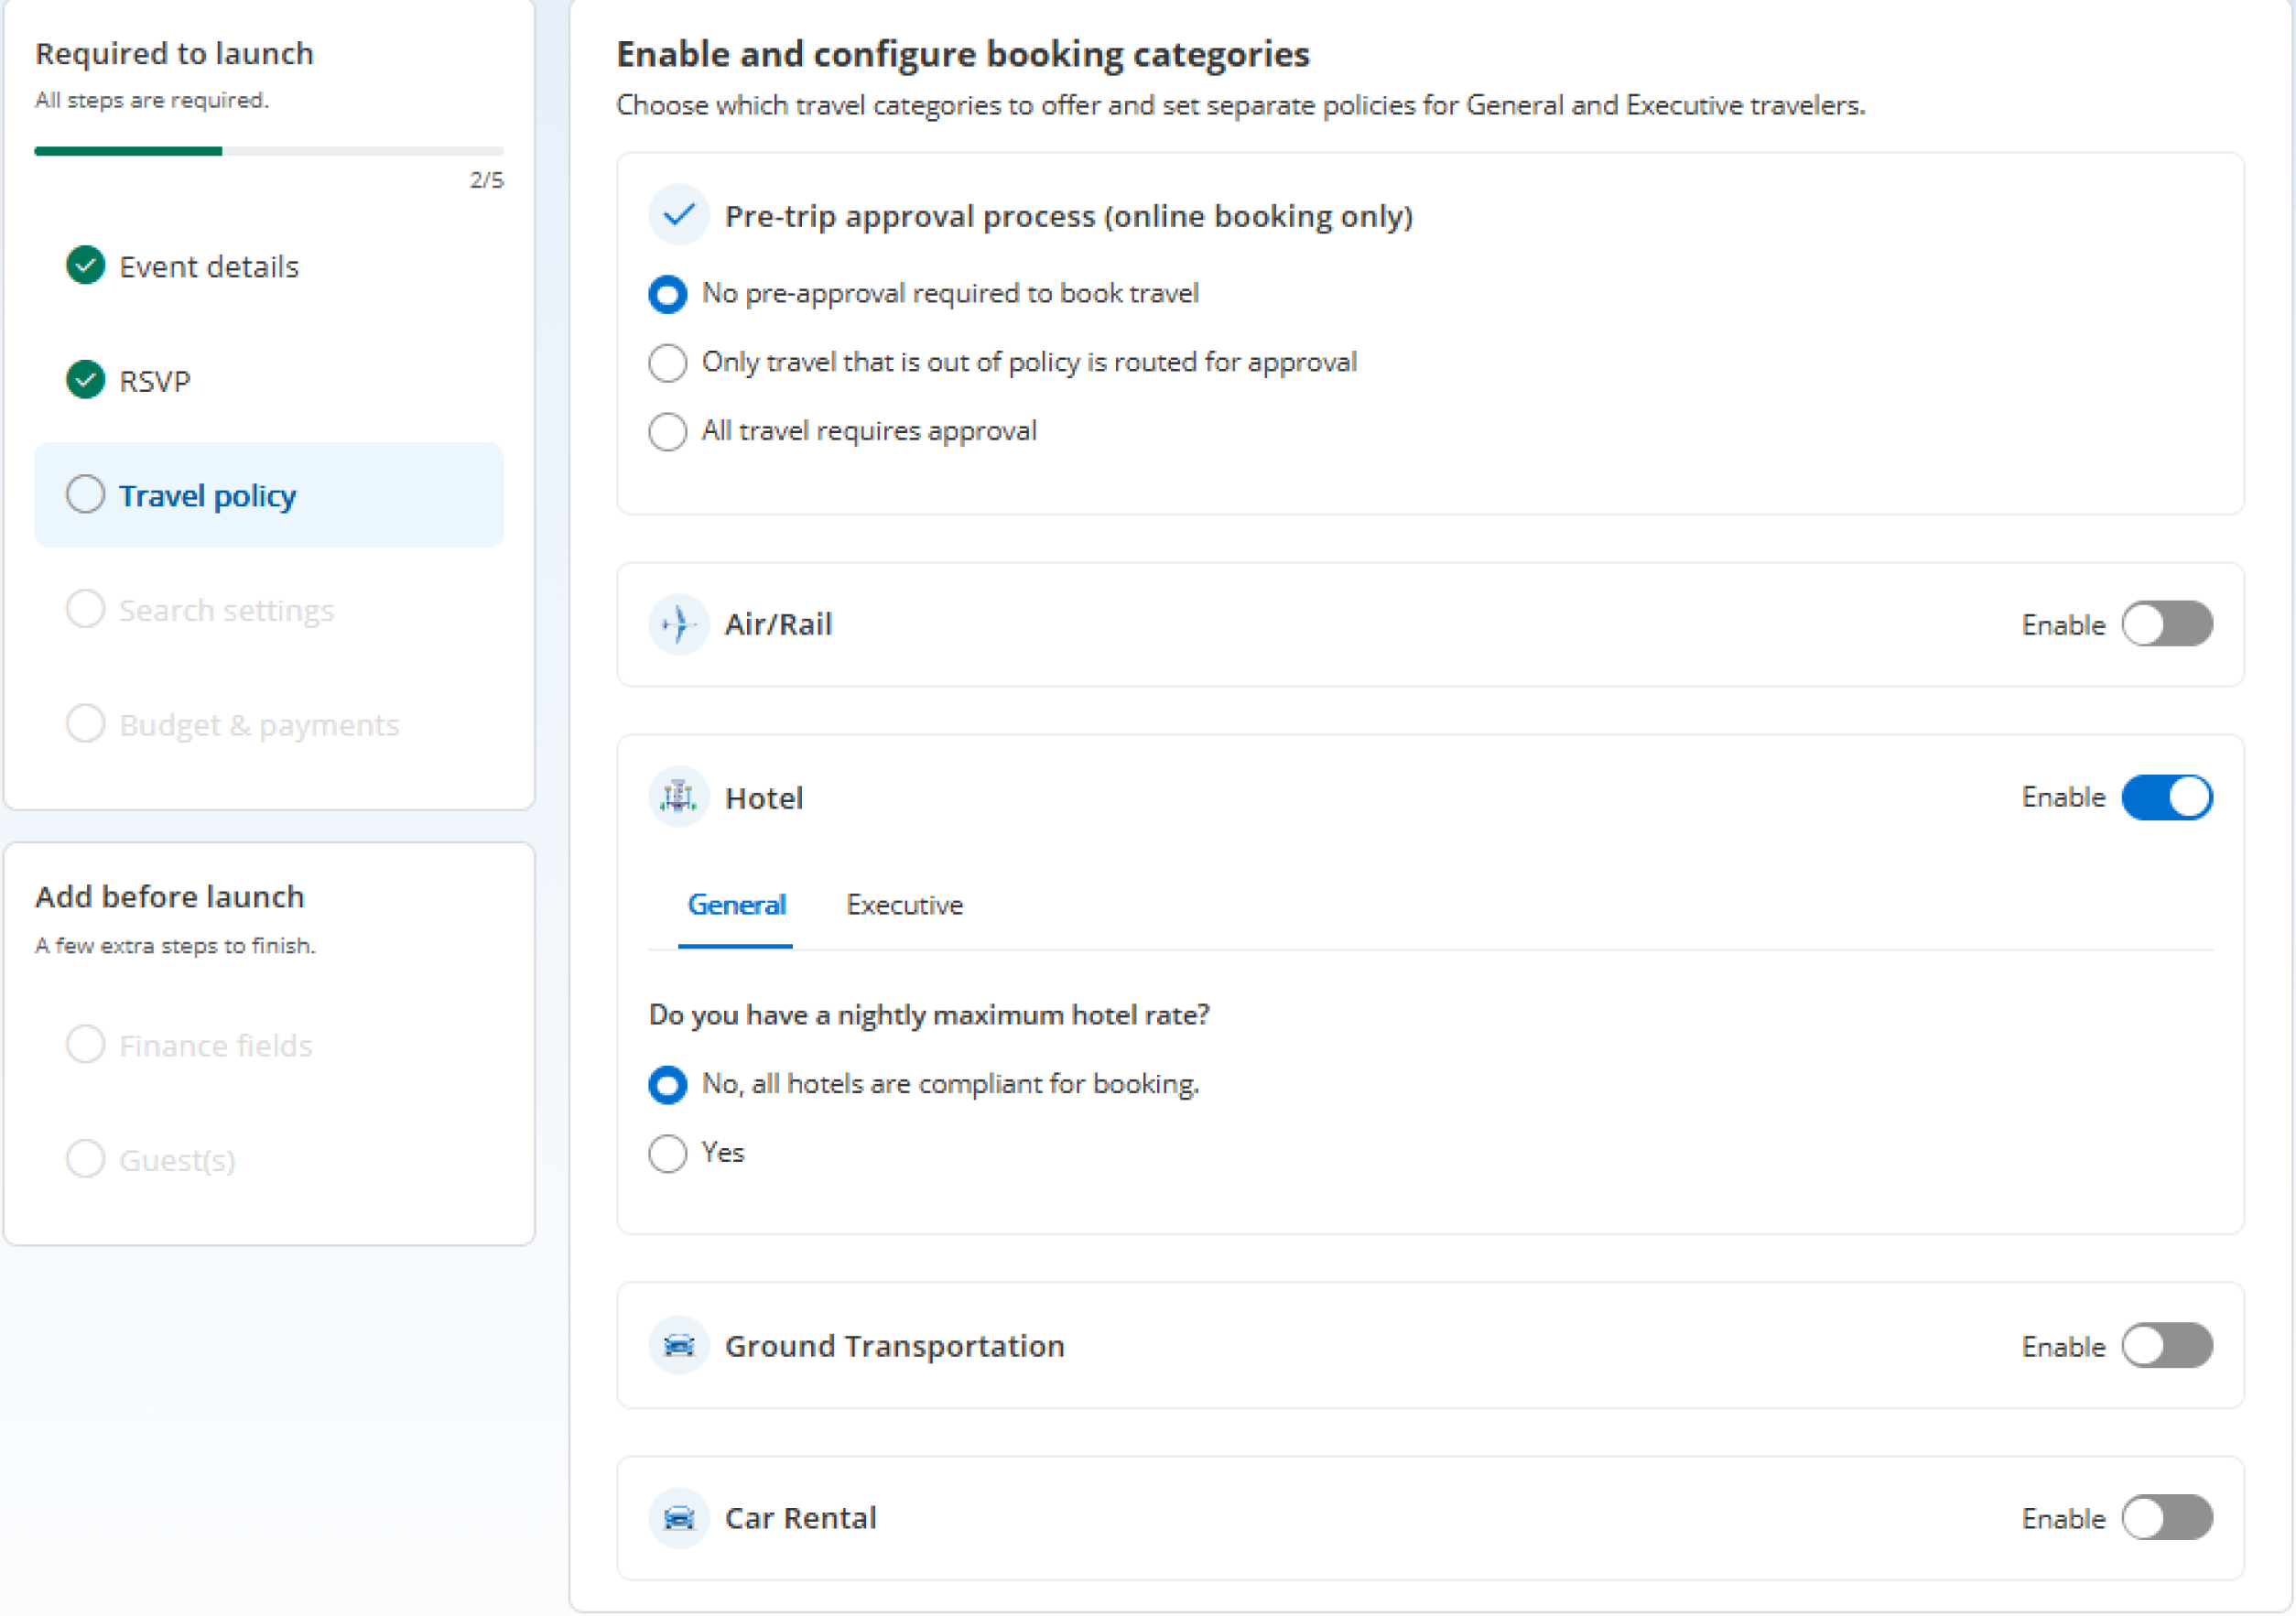
When a category is enabled, the travel policy options for that category are displayed.
For each category, set up a policy for the General and Executive guest groups to customize travel rules based on guest type.
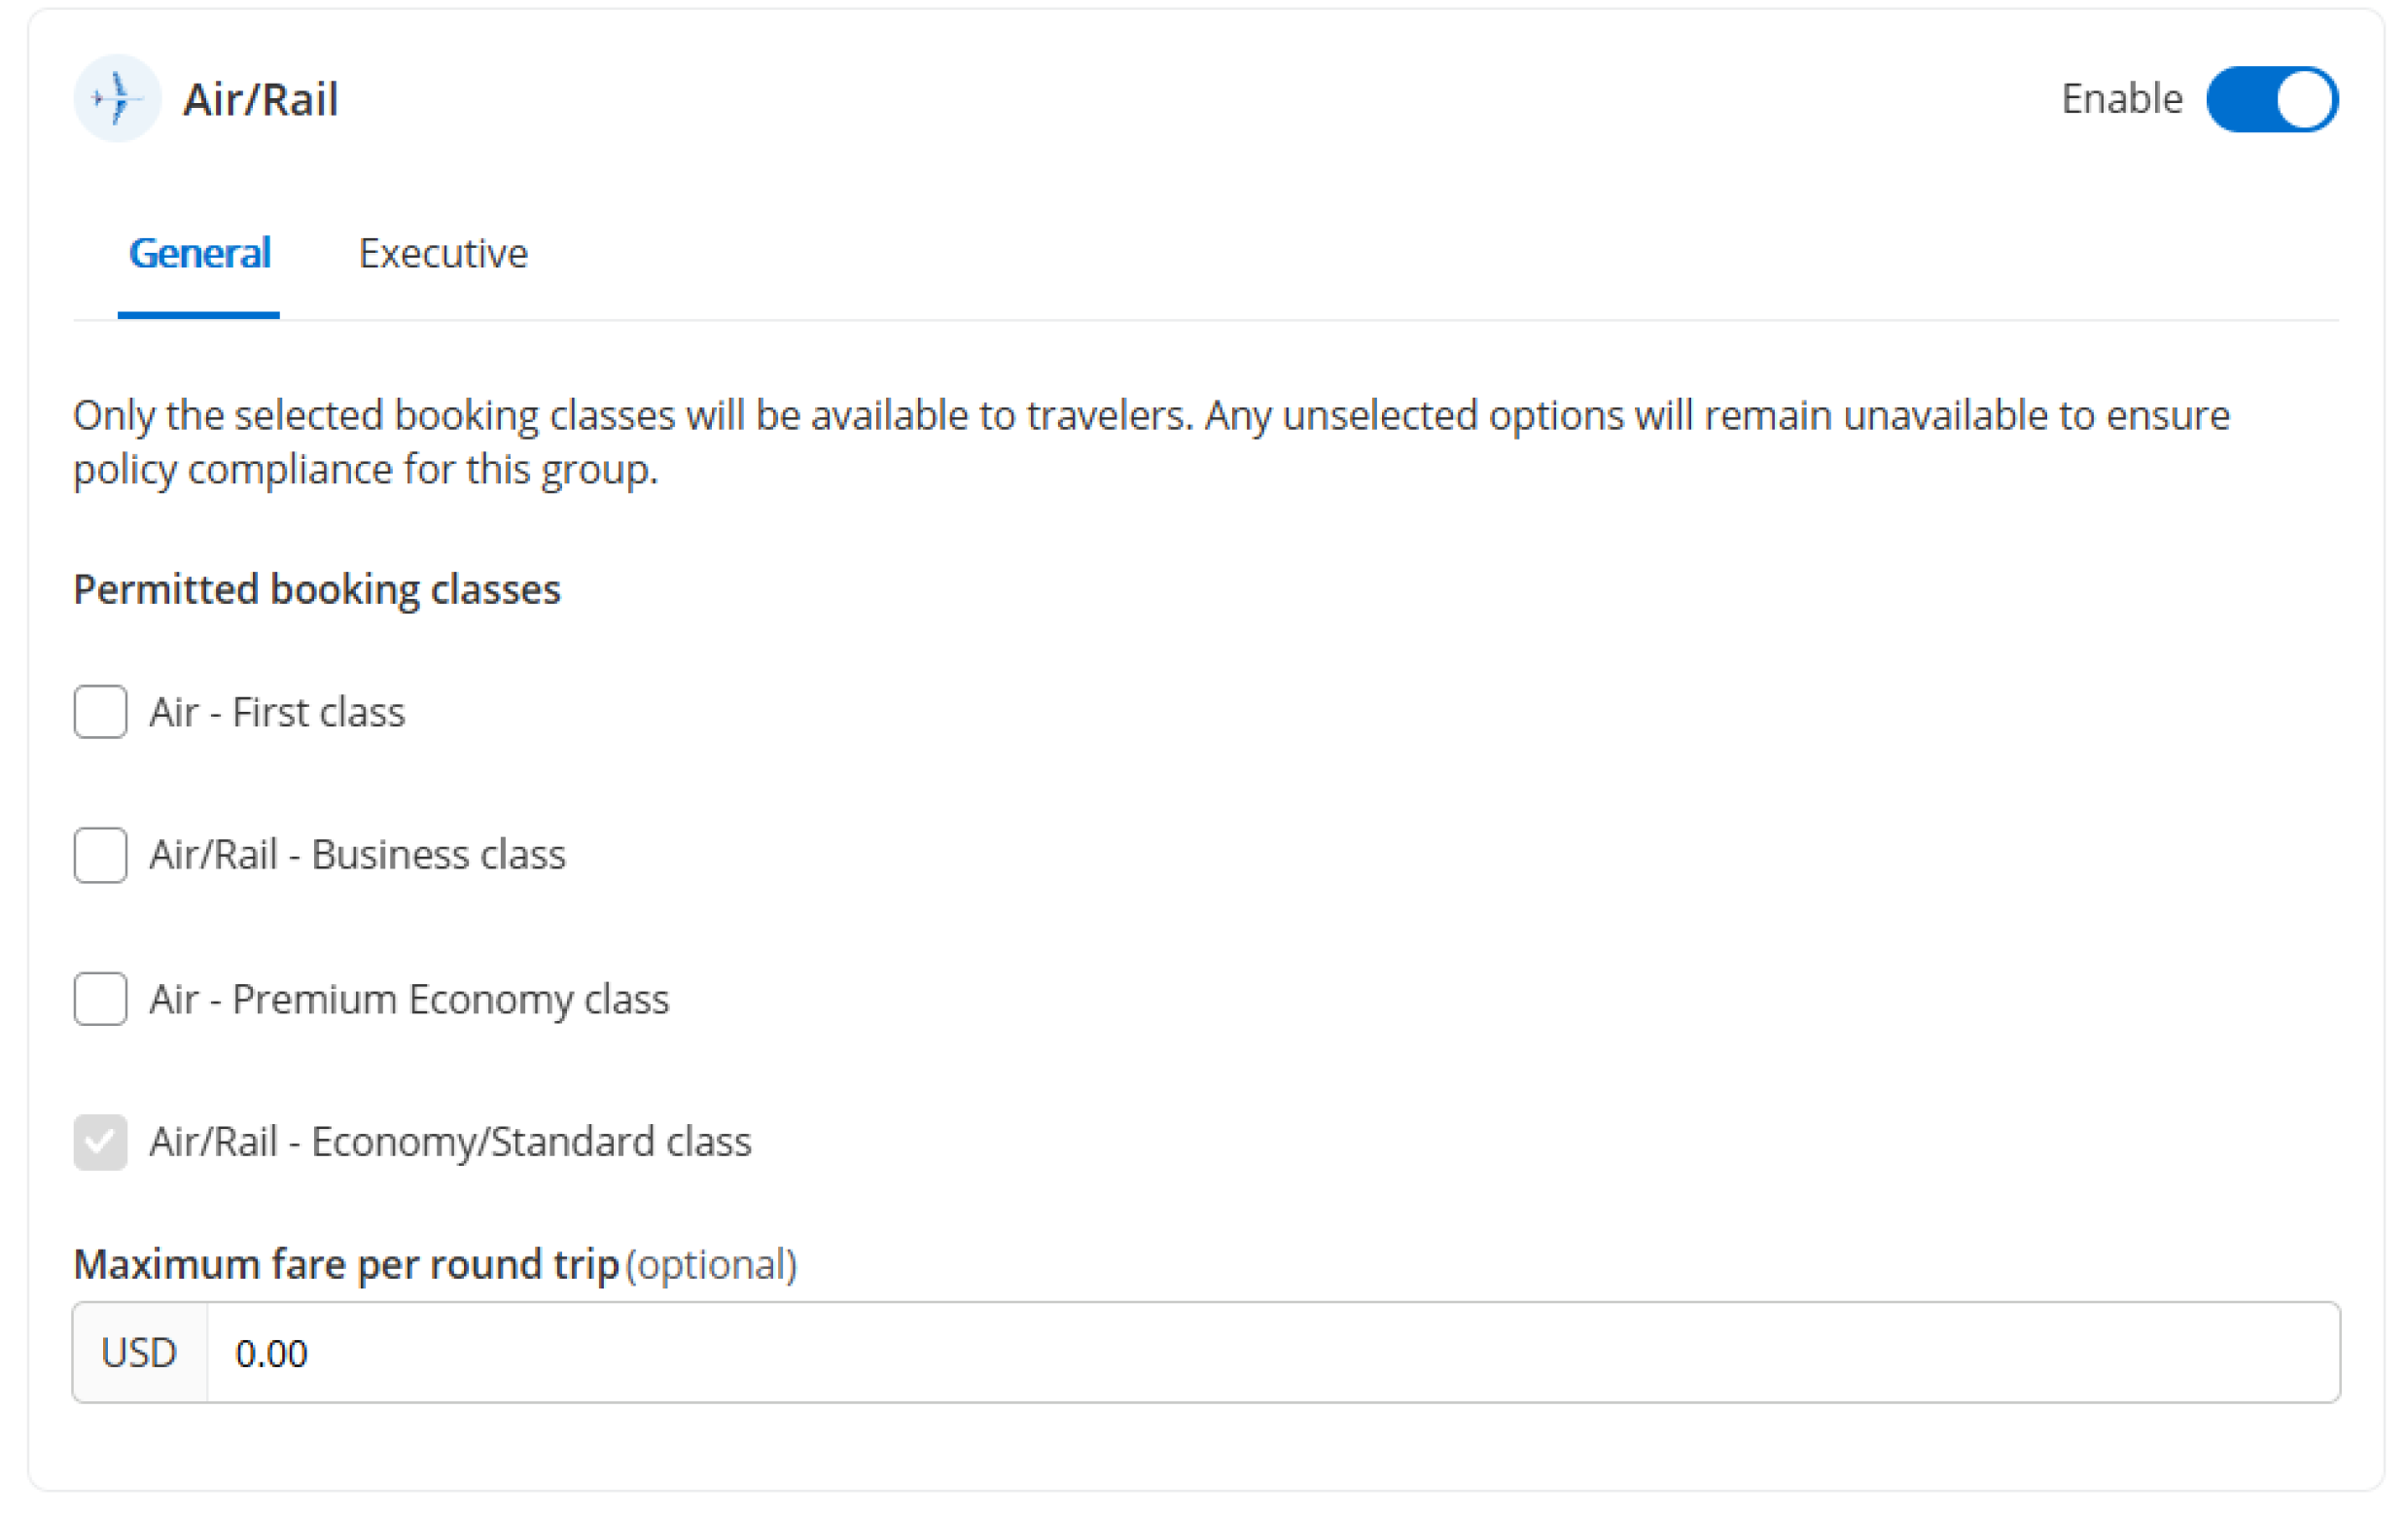
Read this article to learn more about Travel Policy Groups and settings in detail.
Search settings
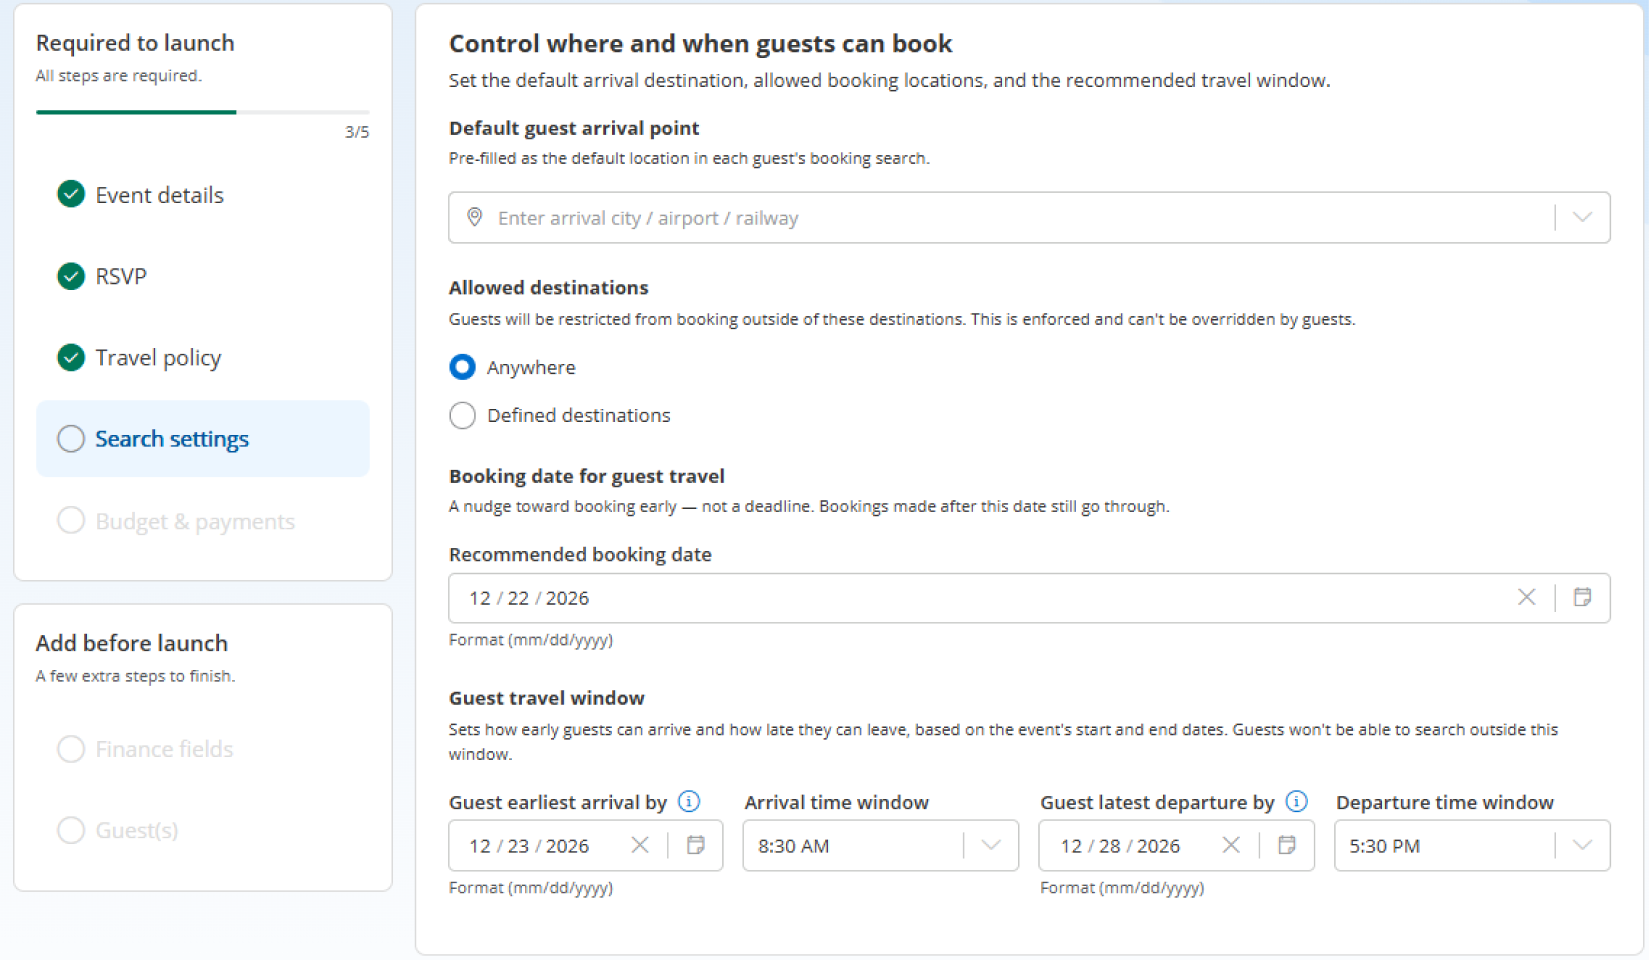
Step 8: Choose where and when guests can book:
- Default guest arrival point: pre-filled as the default location in each guest's booking search.
- Allowed destinations: choose Anywhere, or Defined destinations. Guests are restricted from booking outside the destinations you define, and can't override this.
- Recommended booking date: a nudge toward booking early, not a deadline. Bookings made after this date still go through.
- Guest travel window: based on the event's start and end dates, this sets how early guests can arrive and how late they can leave (earliest arrival and latest departure, each with its own time window). Guests can't search outside this window.
Budget and Payment Configuration
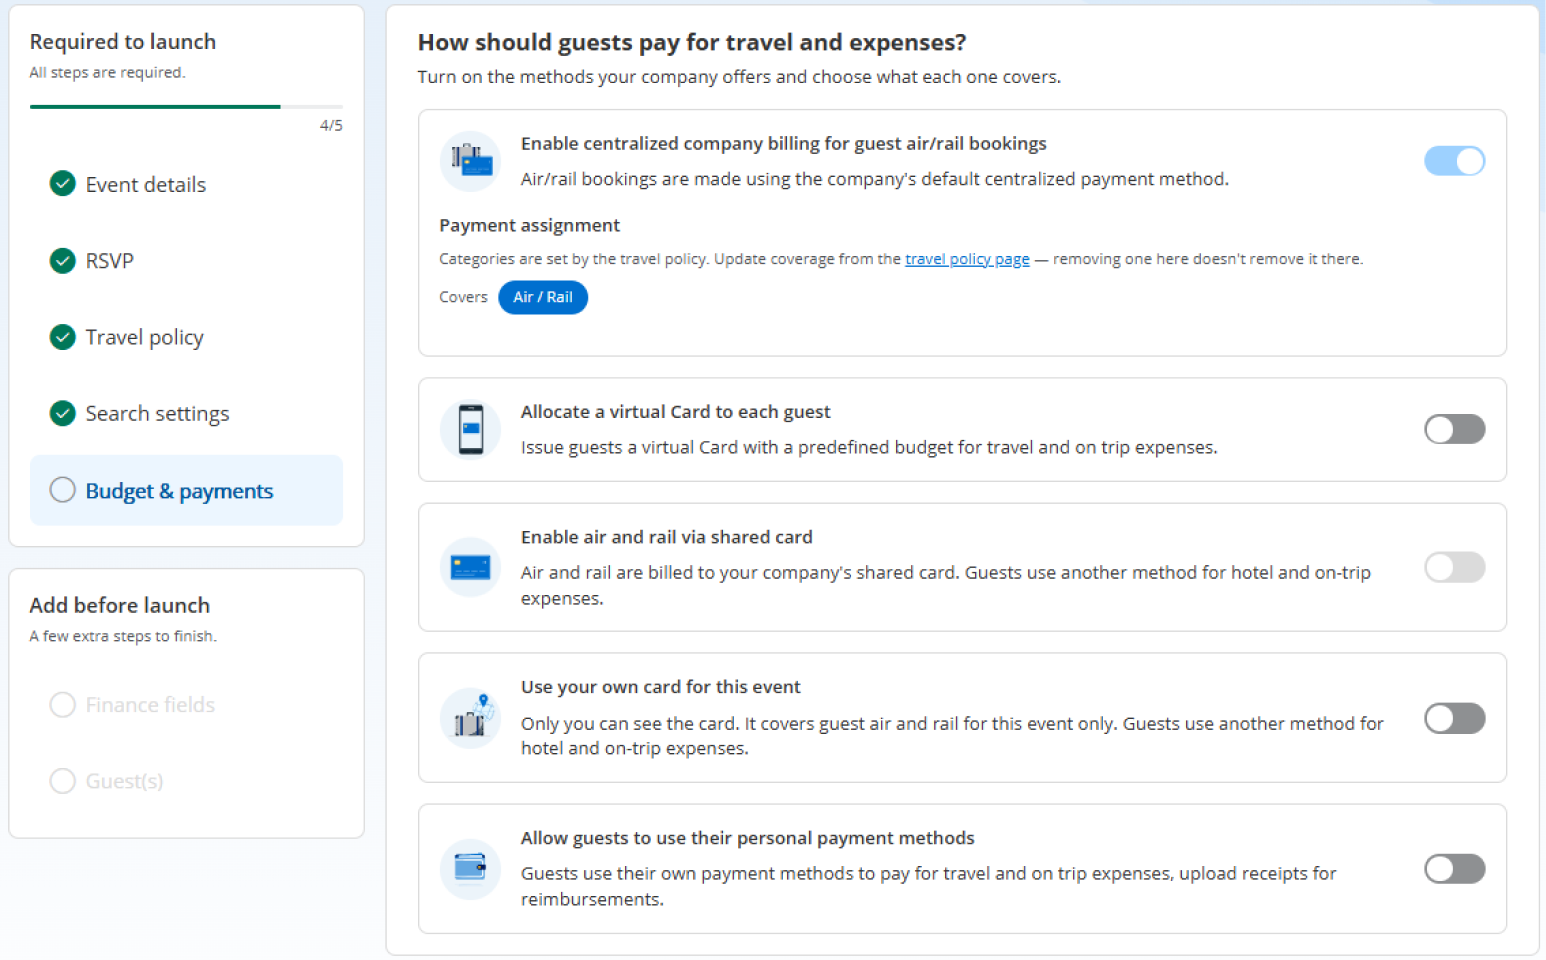
Step 9: Budgets and payment methods.
Select the payment method and expense process that you want guests to use for this event.
- Use your company's Business Travel Account (BTA) for guest air/rail bookings.
- Issue virtual Cards to guests for all expenses.
- Use a lodge or shared card for travel bookings.
- Use your own card for this event's air and rail bookings only.
- Let guests use personal cash and request reimbursement.
We recommend issuing virtual Cards to guests to simplify expense tracking and eliminate the need for manual reimbursements.
1. Payment assignment - select the categories allowed for this payment method.
2. Define a budget - this is the maximum spending limit for each virtual Card. Then enter the virtual Card end date.
3. Toggle on budget flexibility: allow budget increases for unexpected travel disruptions, then set a budget variation approval limit percentage and a max variation amount.
Tip: you can allow 30-40% budget flexibility for complex itineraries with connection risks.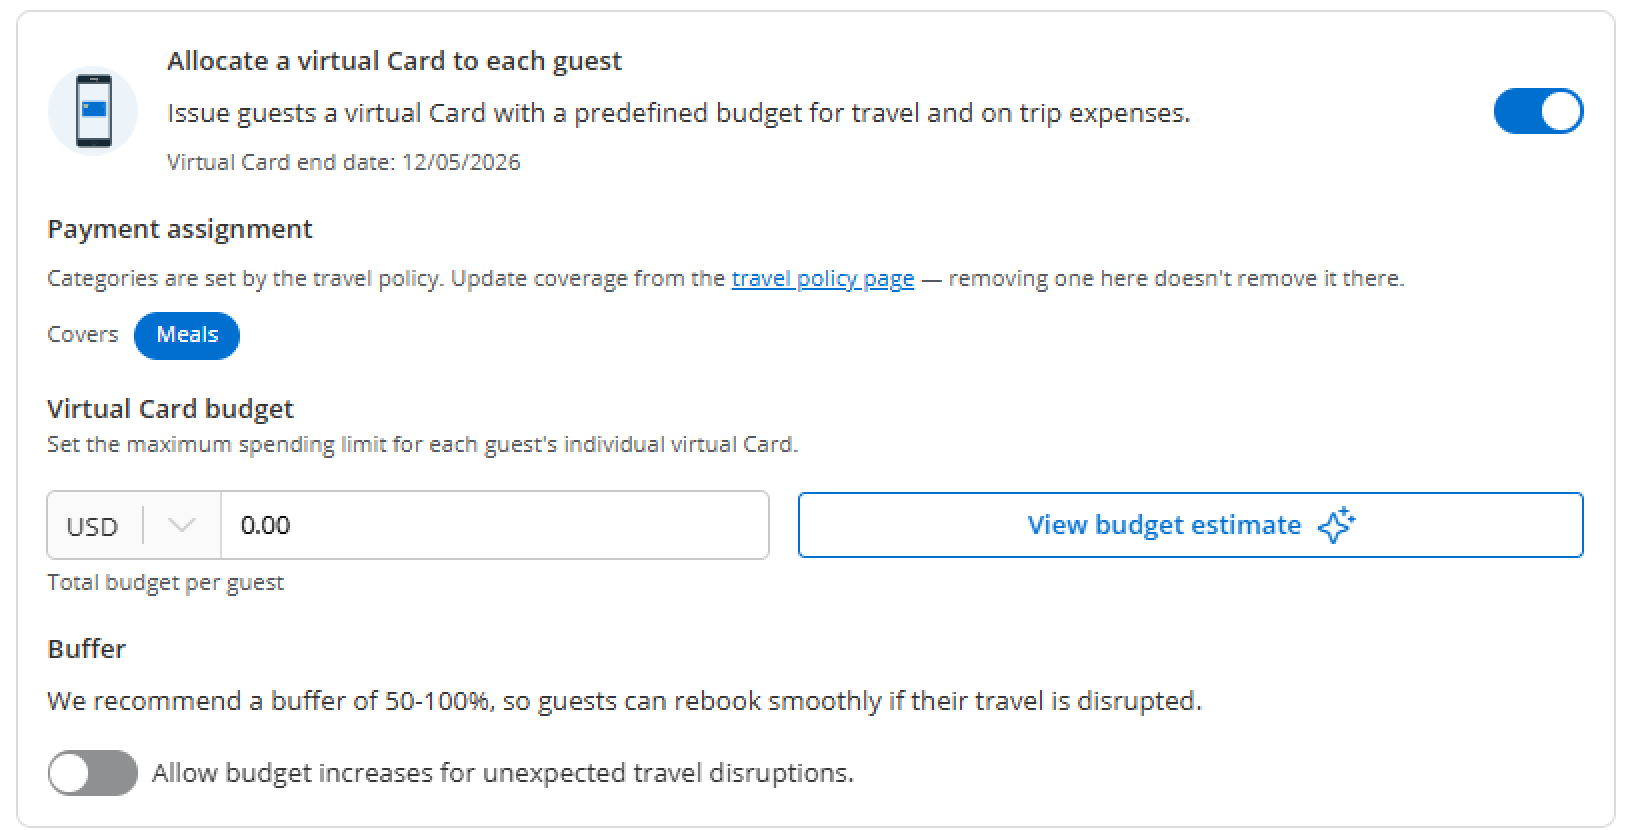
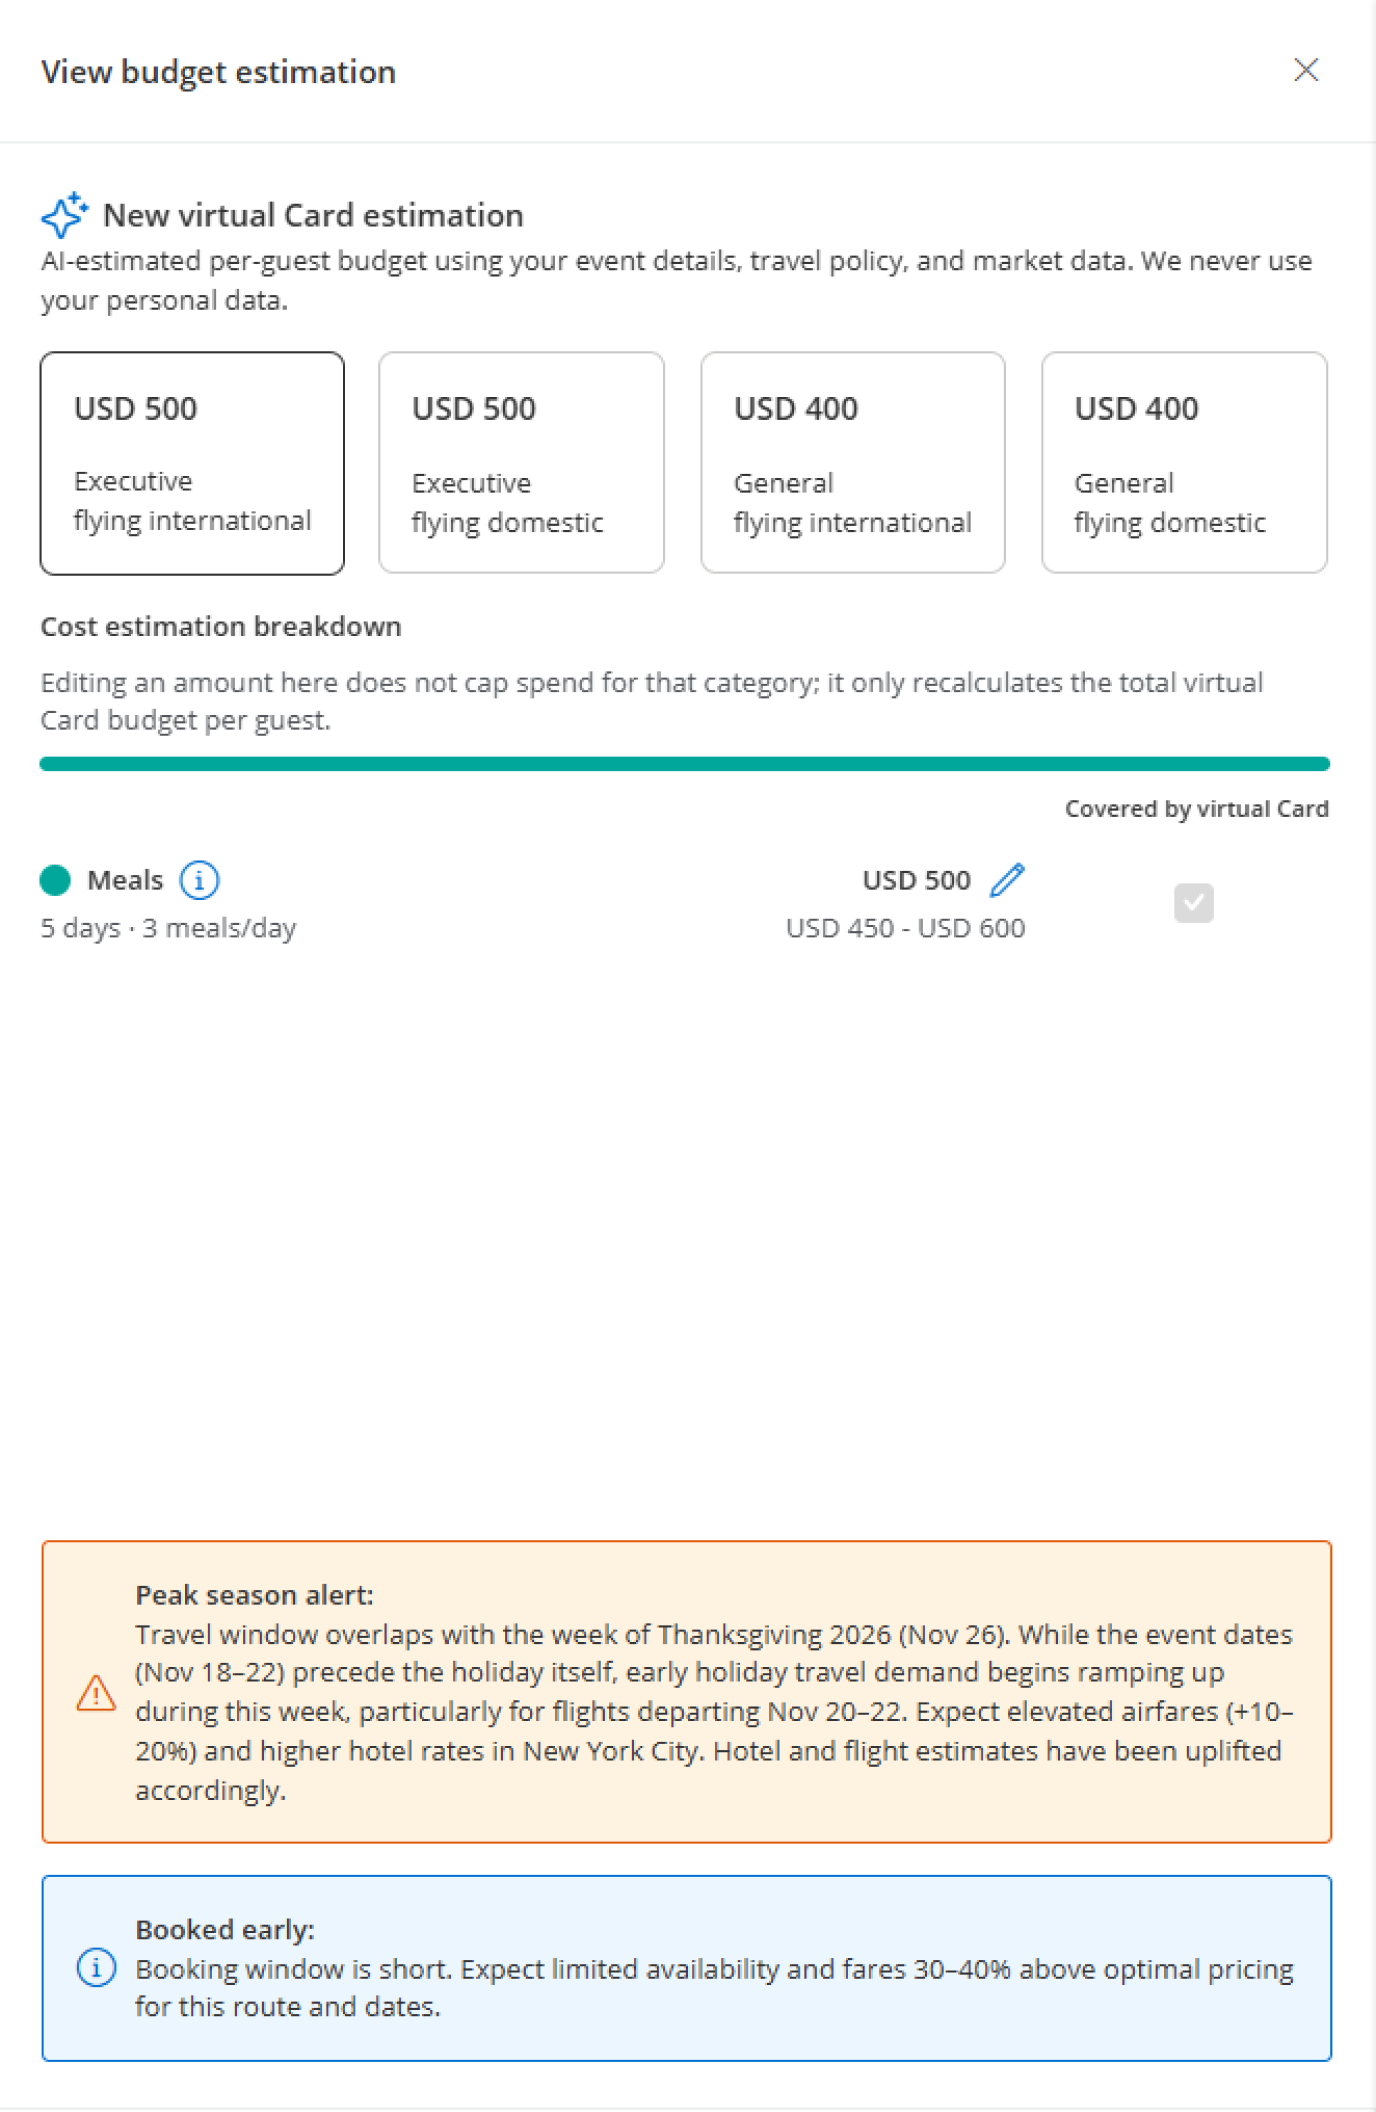
3. View budget estimate: get an AI-estimated per-guest budget, based on your event details, travel policy, and market data. Your guests’ personal data is never used.
Finance fields
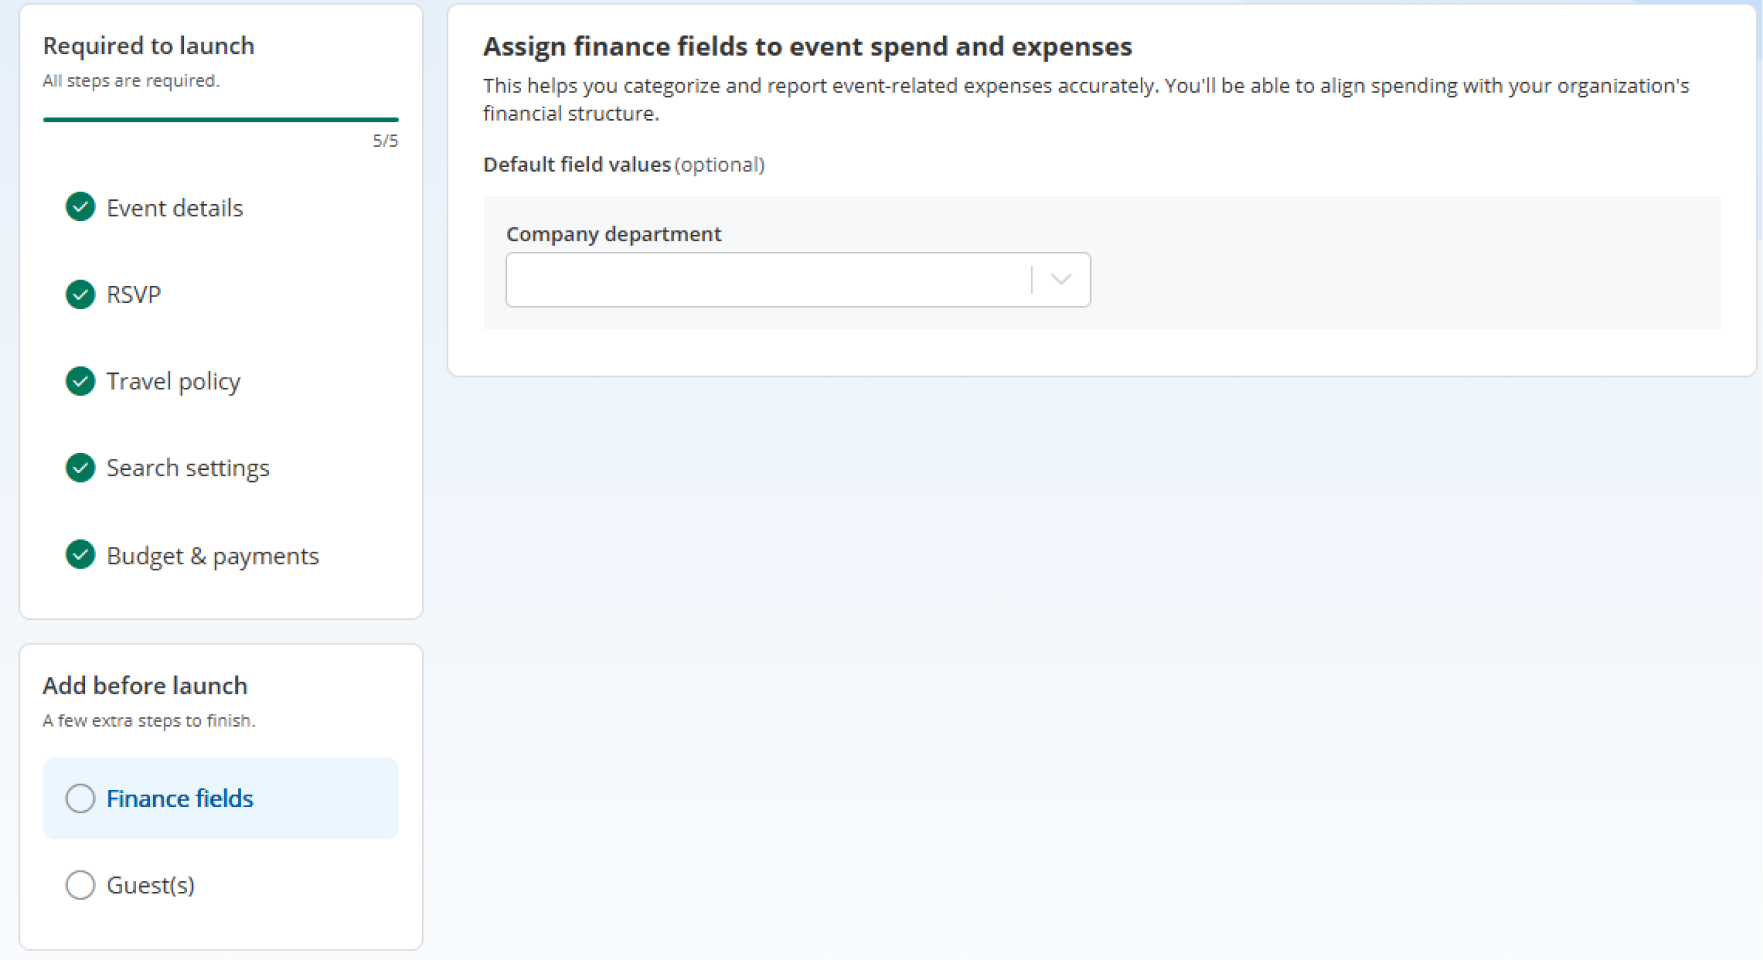
Step 10: Assign finance fields:
Assign finance fields, such as company department, to event spend and expenses. This helps you categorize and report event-related expenses accurately, so spend aligns with your organization’s financial structure.
Guest(s)
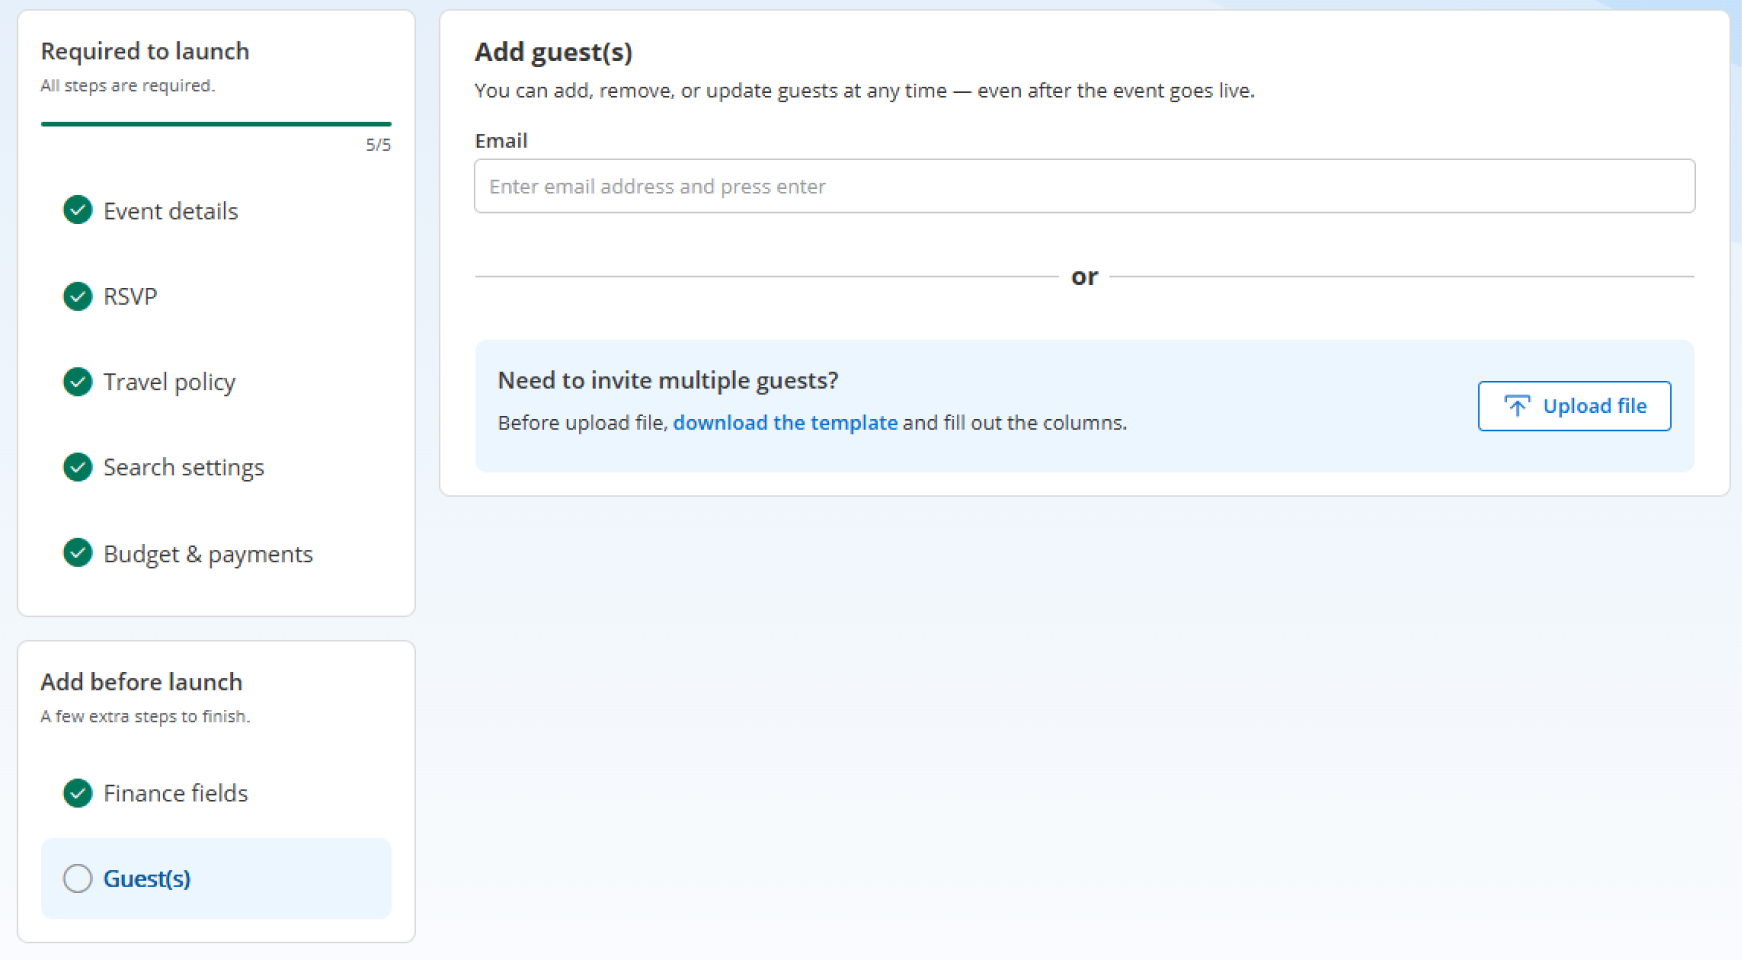
Step 11: Add your guests
You can add guests before or after launch, and add, remove, or update them at any time, even after the event goes live.
Add guests manually: enter each guest's email address and press Enter.
Add guests in bulk: to create multiple guests, download the guest list template, fill it out, then upload it.
Tip: set budget closure dates 5-7 days after the event end date to cover return travel, expenses and transactions processing. Next Steps: review SMS notifications guests will receive.